
Do you happen to live in a ranch style home with a basement..if so you probably are also wondering what to store in the closet in the middle of your home. Ours happens to be right between the kitchen and the livingroom.


We have used this closet for decorations, an art room for my son when he was little, and a place to store boxes of junk.
Ours has this upper shelf that I had to climb on a chair to get to. When getting something from the back of the cube, my 5'4" body was just long enough to be able to reach. So what can be done?
First was removing the front panel of drywall to see how steep the angle of the stair case actually was. Keep in mind that the staircase under that cube is on the opposite end and goes from the main floor to the basement.
I took a utility knife and scored both sides that touched the existing sidewalls first then out came the hammers. Knowing there would mostly be a support in the middle we started for a side and started swinging. SLOWLY.
We finished demolition of that wall with boots and tearing into it with our hands.


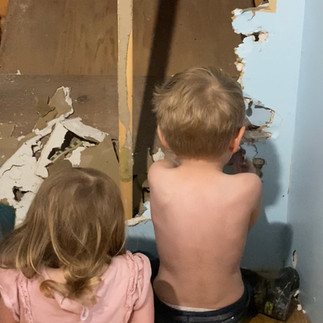
Behind the wall was the slope and a ton of space that was not being utilized for storage.

The planning part of my creative side began. I was going to need a place for the numerous small appliances that we own. I also wanted a space to store canned goods, canning supplies, our vacuum, dust buster, and if we could get it to work.. I really wanted our microwave to be in there. That may seem off to some, but I love having the microwave in a separate space. For one it is just quieter while being used. When it is in the kitchen even the opening of the door can wake someone up with the hardwood floor echo. It also allows my counters to stay a lot less cluttered and more romantic.

\
Yes I meant the word romantic. While walking through at night time I love a dim lit kitchen with a couple of glass globes and cake platters holding different baked goods.
Alright next was to decide where the canned goods and small appliances would go. These white cubes are super easy to put together. They are pretty cheaply made honestly but when you reinforce them with a little plywood and a 2x4 to support the bottom weight, they really serve their purpose quite well.


As you have probably noticed, I always let my kids help. How else are they suppose to learn? Any mistake they make I can most likely fix. The joy in their eyes when they got those screws in was so great.
So at this point I have already decided that I would like two of the cube shelfs stacked and inserted into a drywall cutout to help cut back on how much shelf was in the actual walkway.
My husband cut a supporting piece to go across from stud to stud inside of the wall both top and bottom and then we screwed the top, side and bottom of the cubes into the supports.


Previous to that to cut out the hole we cut from stud to stud with a utility knife and then once again the good old hammer came out. The boxes slid in pretty perfectly. Make sure to measure the distance from the wall to the edge of the front of the box at both top and bottom(for each unit). Once every point of those boxes hit 6 inches from the wall we screwed them in. Also please realize that while you may think you can push the box further, you risk going through your second piece of drywall and into the next room. Be calm and patient. The remaining cubes went up on top of the long cube shelf to hold small appliances. I also take everything and stage it before the final paint, wall paper, or trim is in place.
Next was the storage underneath and to run electricity so the microwave could have its self a new home.

The slant underneath is plywood that is covering the actual slant built in to the top/head of the staircase.
We ran 2x4s horizontally to create a ledge to keep items from sliding down. I wanted a place for my canning supplies, pots, and jars. Jars that are already canned and empty ones..

I built a pull away door that was wide enough to fit my shoulders into as well as any boxes that would be stored in there. The door is held up by the strips of velcro you can see at the top of the frame. They are super strong and even my kids hanging on it will not budge the door off of the frame.


The Door and wall were constructed out of some 2 1/2x1inch trim boards and 2x4s at the top and bottom. I coated them with a white stain to ensure coverage and make them lighter but still keep the wood luck. They were held together with a brad nailer.
After the shelves were constructed, the door and main components were ready to go it; was time for paint and wallpaper.


I wanted this area to be Alice in Wonderland themed..because of one quote that stood out to me.
"Why, sometimes I've believed as many as six impossible things before breakfast.” ― Lewis Carroll, Alice in Wonderland
Which is true for me as a person. I wanted that quote on the door of the pantry so anytime myself or a family member opened it we would be reminded of our potential and never question goals that others seem to think are silly or impossible.
The wallpaper has leafs, mushrooms, woodland creatures, and strawberries. I have little key door handles and a pull light gem along with the actual quote to place on the door. Exciting little details.
So after paint and wallpaper begins the placements of our 11 different kitchen appliances and canned goods. I also made a little side nook to hold our little Dustbuster. Next to the Dustbuster will be more than enough room for our upright vacuum as well.
Be hold the beauty of this closet turned functional space. It creates value to our house and will help our families daily operations run a lot smoother.


When we built this little baby nook into the drywall and frame it out, I thought about the height,(about 7 inches off of the floor) so the kids could grab the Dustbuster if they make a mess and clean it up.
Up top on the shelf is where we keep our bins of Christmas Decorations. I love having them there instead of having to bring them up from the basement or down from an attic. One year our snow globes got so hot in the attic that it broke the seal and evaporated the water within them.
Even though this closet does have a pull string light I added in a couple of sensor lights that are usb rechargeable. They only stay on for a minute at a time(once you have left the area) so the charge lasts quite a while. They give us a soft light that is bright enough to see all of the shelves and can guide our way when grabbing the vacuum, aprons, or using the microwave.
Here are some of the pictures with links attached below for items you can purchase to make this space yours today.
Will you update your closets and make them more functional? Wilson Wonders.
Comentários